-
0
Your CartOrder Subtotal0.00
- 0
Great Ways to Enhance Your Outdoor Environment Today – A Landscape Lighting "How-To"
At Lightology, I field a lot of requests from customers that are intimidated by exterior and landscape lighting. However, helping my customers add value to their property through outdoor lighting is exactly what I do, and it is why they come to me in the first place. I'm an expert, and I know how to make their outdoor areas – front yards, backyards, decks or gardens - look great with great outdoor lighting fixtures and techniques.
The bottom line is that this does not have to be an overwhelming project. It can be as simple, or as detailed as you like. After you read through these basics, check out my ideas for putting it into practice - things you can do today!
My goal in creating this "Basics of Landscape Lighting" is to introduce a few key outdoor lighting concepts that you can implement right away. To help, I will use specific examples that illustrate the principle behind the idea. This will give you more than enough information to begin thinking about what would work best for your exterior environment and how to achieve a beautiful outdoor space through lighting!
I want to add some life to my yard and hope to do that with lighting. What should I know before I start? Where do I begin, and what can I do?
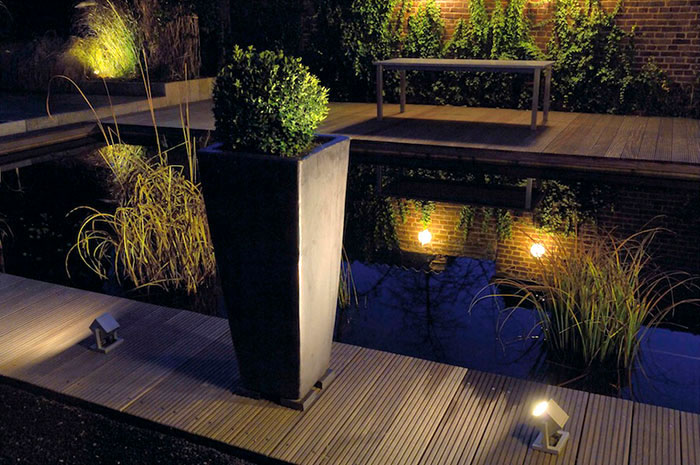
When thinking about how to design exterior landscape lighting the first thing to know is that less can be more. Because the eye is drawn to areas with the greatest amount of visual contrast, it doesn't necessarily take many lighting fixtures to create a really beautiful effect.
With that basic "less can be more" principle in mind, the next step is to determine what you are trying to light. What you do not want to do is light up your whole yard like a Las Vegas casino. If everything is highlighted, then nothing stands out and nothing is special. Instead, consider what features you want to show off, and determine how you plan to use specific outdoor areas. Select those few choice features, light them well (in terms of light quality, appropriate beam spread, and fixture placement), and then think about filling in other areas.
Keep in mind the perspective from which you will be viewing what you are lighting. As an example, if a featured tree will be seen from all sides, a single accent light will not achieve the desired effect. You will need to add lights to the additional viewable sides.
How much light do I basically need to create a pleasant outdoor atmosphere?
Not all that much if you're just lighting objects in the yard. As we find with small, desk mounted task lamps, you can make a little go a long way by placing a small amount of light just where you need it. Keep in mind that at night, your eyes are already adjusted to the dark. If you keep overall light levels low, then the contrast between light and shadow of a highlighted exterior feature can create a much more dramatic effect.
If you have a favorite outdoor reading area, consider putting a spot in a tree or above in a pergola, and direct the light down, over your shoulder. For outdoor dining / entertaining, you really do not need a lot of light, and there are many ways you can create a great summertime entertainment center with light. In the end, you do want to create a casual, relaxed mood for your outdoor space.
What is color temperature?
Don't forget about color temperature, as light quality is just as important as light quantity. Color temperature is measured on a Kelvin (K) scale. You can find the color temperature for a light bulb listed on its packaging. Color temperatures 3500K and above are generally considered to be cooler temperatures that become bluer in tone (towards a clear midday sun) as the value goes up. Temperatures 3000K and below are considered warmer. As values decrease, the light assumes a more amber tone.
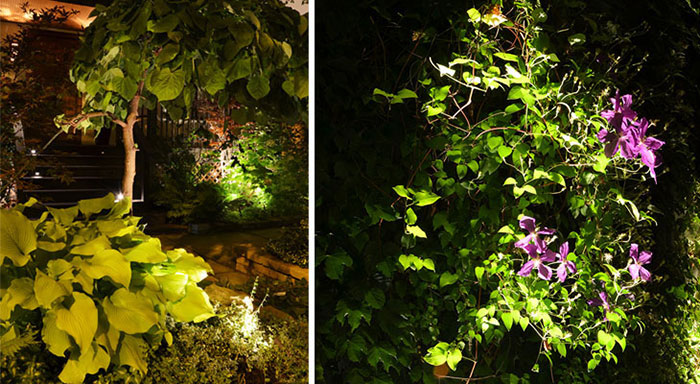
Stay away from cooler color temperatures when lighting outdoor landscapes. The bluish tones from cooler temperatures can make environments appear sickly or unnatural, imparting a sense of uneasiness, and being on edge. Instead, opt for lighting with a very warm color temperature: 2700K LED is ideal, and 3000K is okay, too. The 2700K temperature offers a very soothing and natural tone that mimics the warm, comforting glow of a campfire. As such, it is ideal for creating relaxing, comfortable outdoor environments.
Remember that color temperature refers to variations in the appearance of white light, and it is completely different from RGB LED lighting. Relatively new, RGB LED fixtures offer the possibility to add colored LEDs into lighting designs. Use RGB LEDs sparingly outdoors; reserve them to create a temporary party atmosphere.
DID YOU KNOW?
According to the US Department of Energy, LED bulbs can be six to seven times more energy efficient than incandescent lights, save over 80% more energy, and last 25+ times as long as traditional light bulbs.
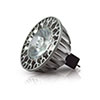
Now you can add LED lighting to your outdoor landscaping fixtures. The Soraa Outdoor LED is the first LED MR16 that works in enclosed, unventilated or sealed metal fixtures (except aluminum). It uses only 9.5W and replaces 35W halogen lamps!
What is layered lighting, and is it important for my outdoor space?
In its most basic form, layered lighting is a means by which one can create "highs" and "lows" in the lighting plan to add emotion, drama or beauty to a space. It is definitely an important tool that should be used in an outdoor environment. It is all about the ability to set the mood for different situations.
It might be as simple as putting different lights on different circuits. Maybe pathway lighting is on a circuit independent from your deck lighting. Layered lighting is also about controlling established lighting in your environment for different purposes. There are a wide range of dimmers and controls available that will allow you to create different light settings for various events. Perhaps a patio will have different preset levels for an evening's festivities: from setup through dining, party through clean-up.
Layered lighting is a really great way to exercise your creativity. I've done a job where step lights were connected to motion sensors. Here the stairs would illuminate as someone would ascend. I've even done a job where lights moved in time with music!
Are dimmers or other controls useful outdoors?
Dimmers and other controls can be great additions to outdoor environments, as they allow you to create or change the feel and mood of a space with ease. Keep in mind however that if different light sources are all operating off the same dimming circuit, all the fixtures on that circuit would dim at the same time. It is best to plan ahead – consider what fixtures you want to control and the means by which you wish to control them. In addition to dimmers, some other control options you might consider include:
- Motion-activated sensors for security lighting, or pathway lighting.
- Sunlight-activated sensors that shut off lights when enough daylight is present.
- Time clock and astronomical time clock sensors that automatically predict sunrise/sunset times each day and switch lights on/off accordingly.
One of my favorite projects involved using a really cool dimmer that dims the lights up on a 3-second fade-in! I integrated this Lutron Maestro with motion sensor dimmer to lights on a front stairway for a great effect. However, because this dimmer is designed to be used indoors, I had to install the unit inside the foyer of the office to control the exterior lights.
Would Low Voltage or Line Voltage be a better choice?
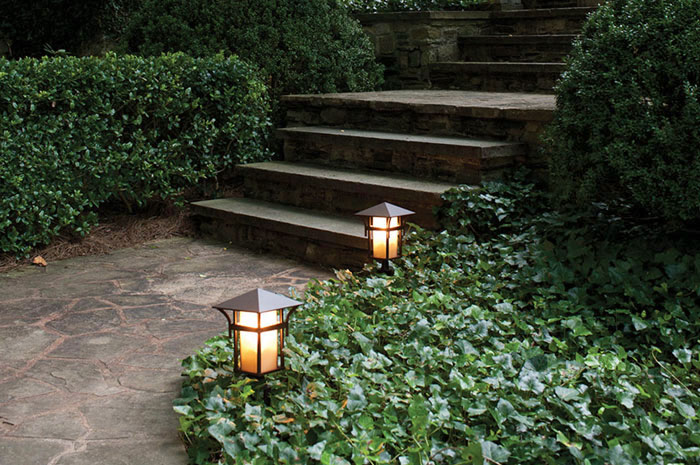
For outdoor landscape and garden lighting, low-voltage (12 volt) fixtures are definitely the way to go, especially in a residential application. The cable can be run on the ground, or buried slightly below surface. Because 12 volts is safe to touch, there is no danger of shock if someone accidentally cuts the cable with a lawn mower, or a shovel.
What are the pros and cons of outdoor LED lighting versus other lamp sources?
Let's start with the pros. First, LEDs are much more energy efficient. Because they use so much less wattage than comparable halogen bulbs, many more fixtures can operate off of the same transformer (an item that converts line-voltage power to low-voltage). Second, the life of LEDs is much greater—they generally last about 50,000 hours compared to 3,000-10,000 hours for halogen sources. Third, LED lights are available in the very warm, 2700K color temperature I mentioned before. Halogen only gets as warm as 3000K. Visually, the very warm LEDs give you that nice warm feeling of hanging out at a camp fire. Last, LED lamps are not physically warmer to the touch. In fact, they are much cooler to the touch—another plus!
The only real con to an outdoor LED source is the up-front cost associated with the light fixture itself. They are more expensive than their halogen counterparts. However, in the long run it only takes 4-5 years to make up for that cost in energy bill savings and future purchase of new lamps (aka light bulbs).
There seems to be a lot of talk about solar powered LED landscape lighting and outdoor lighting lately. Is solar lighting a good way to save energy?
I have never recommended solar-powered fixtures for the Chicago area (or most areas, for that matter) because of the overall lack of sun, compared to sunbelt areas of the US. I've tried them in the past and didn't have good results. Even if you are in a sunny area, the basic premise is a bit dicey. The problem is that the solar cells are on top of the fixtures themselves.
Where do you generally place landscape fixtures to light things? Under trees and around shrubbery. They generally sit in the shadows of plants all day and don’t receive enough direct sunlight to get a decent charge, anyway. Overall, even a fully-charged solar-powered landscape light just doesn't put out the amount of light you need.
What's more, they tend to emit the exact kind of bluish-white light that you should really avoid when lighting your landscape and garden. Remember: opt for warmer, more amber tones (2700K – 3000K) for a pleasant atmosphere.
Although I do not recommend solar powered landscape lighting, I still highly recommend non-solar powered LED lights. They are energy efficient, low-maintenance, and visually appealing (see above).
Looking for more information?
Our lighting experts would be happy to help you make your landscape shine.
Contact us at (866) 954-4489

Top Sellers
120V Outdoor PAR Spot Light
by Hinkley Lighting
$72
DWCL2 Composite Micro Beacon Fixture
by Hadco by Signify
$187
B1 Aluminum Bullyte
by Hadco by Signify
$77

